
To connect your Stripe terminal to Abode, you will need to register the device and pair it with your Abode account. This can be done by entering the device registration number in the Stripe settings. Please follow the step-by-step guide below.
If at any point you would like more information or to customize the terminal appearance, refer to the Stripe documentation.
Connect a Terminal to Abode
1. Turn on the terminal by pressing and holding the power button until the device vibrates and the screen turns on. After the device powers on, press the power button to sleep or wake the device.
2. To open the settings menu, swipe right from the left edge of the reader screen to reveal a Settings button. Tap the Settings button and enter the admin PIN 07139.
3. Select 'Generate Pairing Code'.
4. Remember this code, then log in to your Abode account and navigate to Settings > Stripe.
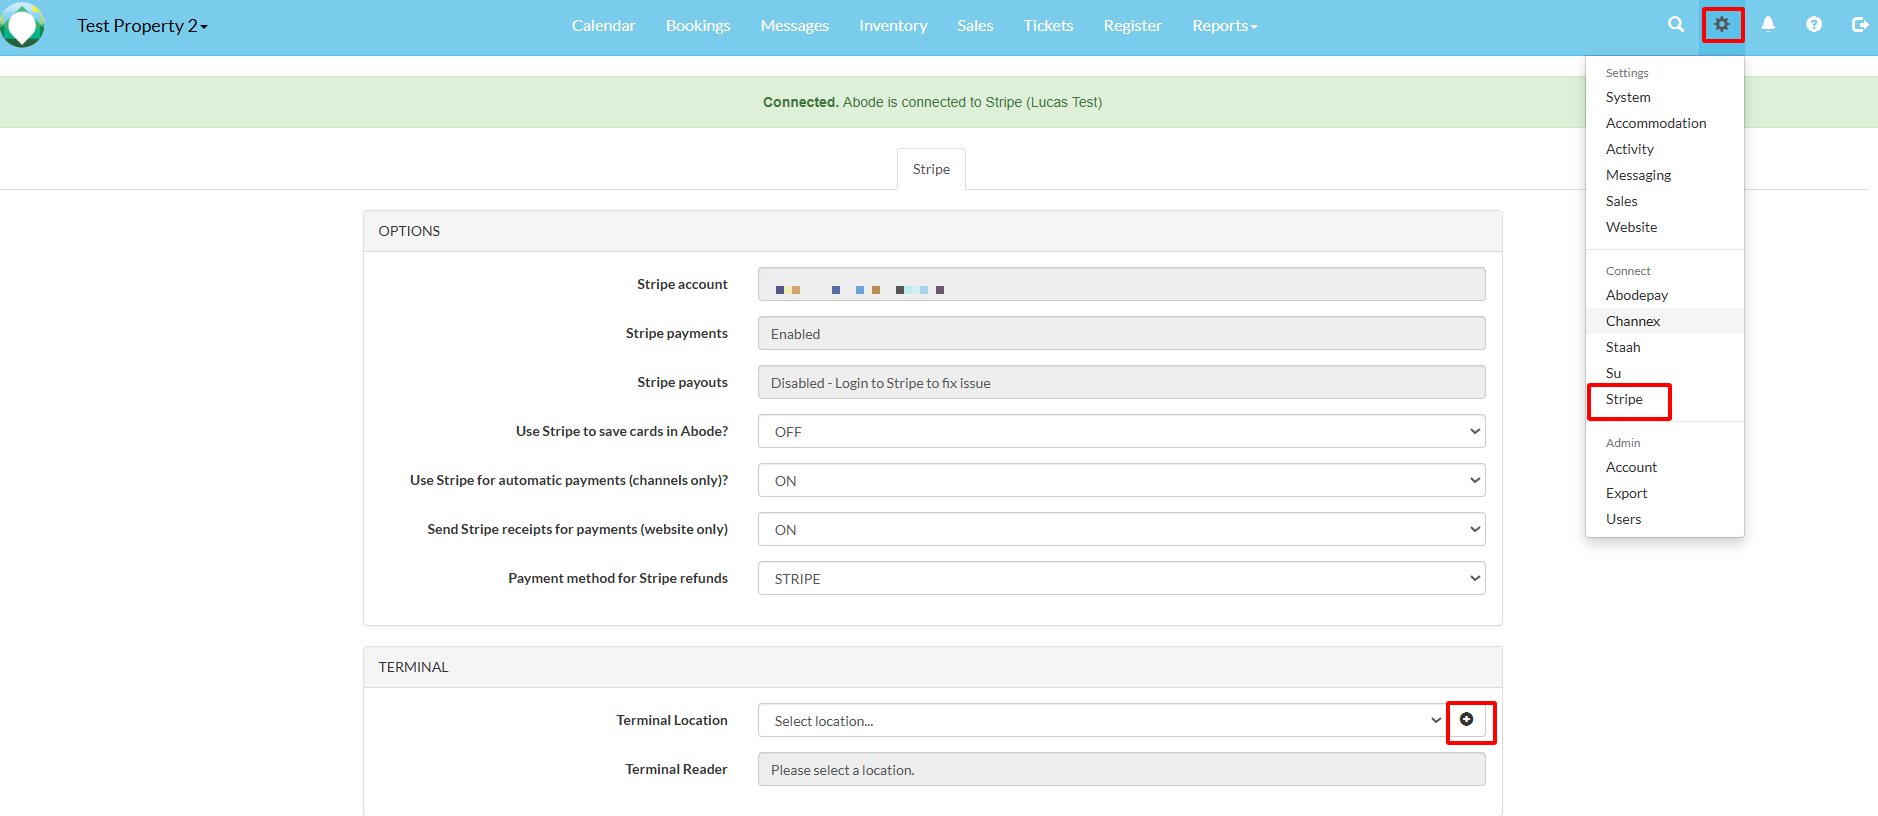
5. From the 'Terminal' box, select the '+' icon for 'Terminal Location' and add the required information. 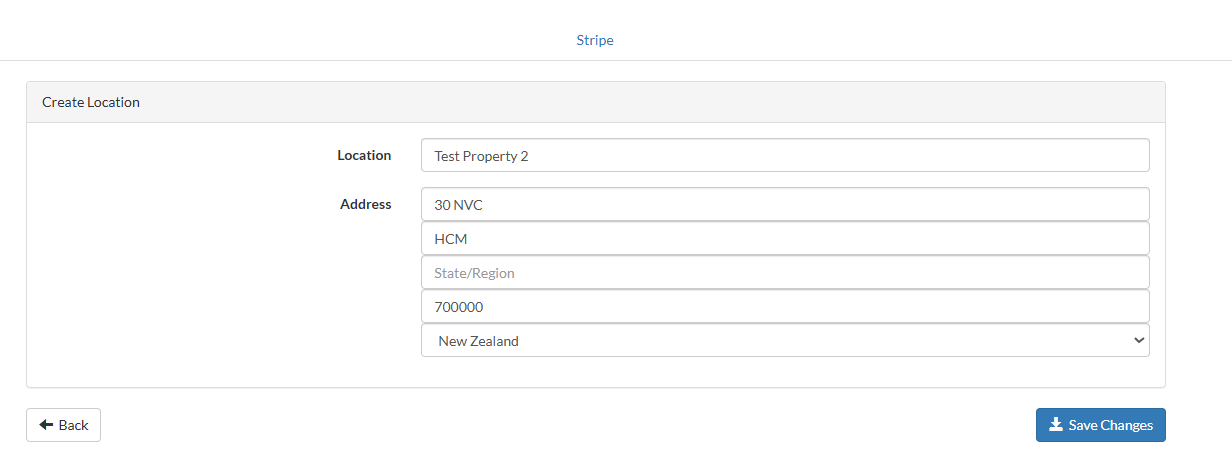
6. Next, select the '+' icon for 'Terminal Reader' and enter the name you would like to call the terminal. In the next field, input the registration code from Step 3, then select 'Save Changes'.
Connect the Terminal to the Internet
The reader must connect to the same local network as your point-of-sale application. On the terminal, go to Settings, then select WiFi Settings to choose the network and connect.
It's important to follow all of these steps carefully to ensure your terminal is properly registered and connected to Abode. If you encounter any issues or would like to customize further, refer to Set up BBPOS WisePOS E | Stripe Documentation, or contact support@abodebooking.com for assistance.